Halloween Cinder Cake Recipe (Spooky & Easy to Make)
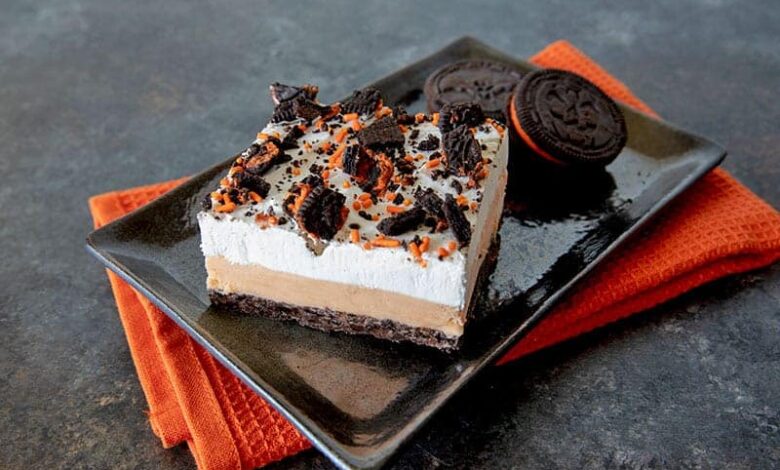
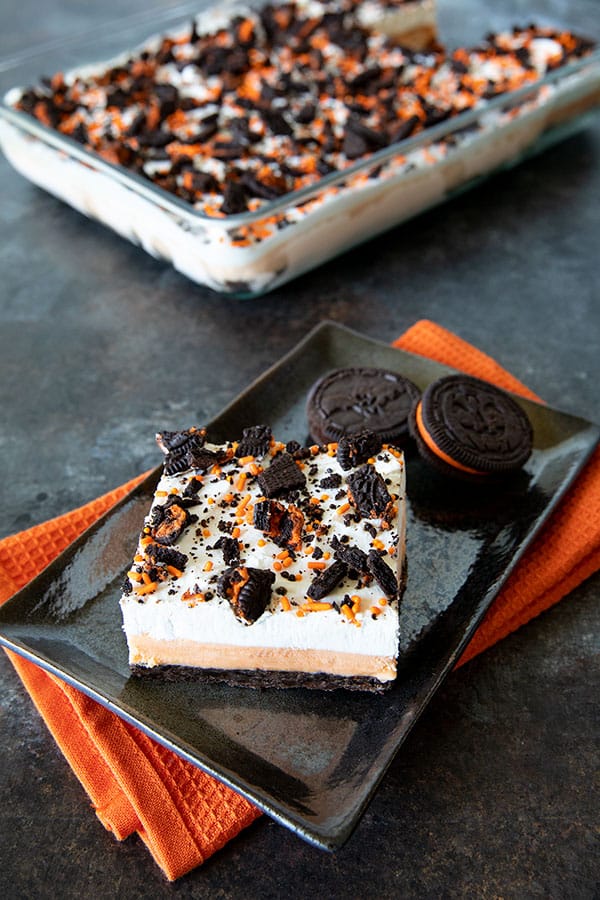
This festive Halloween Cinder Cake combines crunchy chocolate cookies with vibrant orange sherbet and fluffy whipped cream for a no-bake frozen dessert that’s perfect for your spooky celebrations. With its eye-catching black and orange layers, this easy ice cream cake delivers both flavor and visual appeal without requiring any baking skills.
Table of Contents
What is Cinder Cake?
Cinder Cake is a classic frozen dessert that layers crushed cookies, ice cream, and whipped cream into a simple yet impressive treat. The name comes from the dark “cinder-like” appearance of the crushed chocolate cookies used in the crust. This vintage recipe has been enjoyed by families for generations and adapts beautifully to any season or celebration.
Unlike traditional cakes that require mixing, baking, and frosting, this frozen dessert comes together quickly with just a few simple steps. The combination of textures—from the crunchy cookie base to the creamy frozen middle and pillowy whipped topping—makes every bite interesting.
Why This Halloween Version Works
This Halloween twist on the classic recipe swaps vanilla ice cream for bright orange sherbet, creating a dessert that’s perfectly themed for October festivities. The orange and black color scheme naturally fits the Halloween aesthetic, and using seasonal Oreo cookies adds a fun, festive touch.
The orange cream sherbet offers a refreshing citrus flavor reminiscent of creamsicles, which pairs wonderfully with the rich chocolate cookies. Kids and adults alike love the playful presentation and the familiar flavors combined in a new way.
Ingredients You’ll Need
For the Cookie Crust
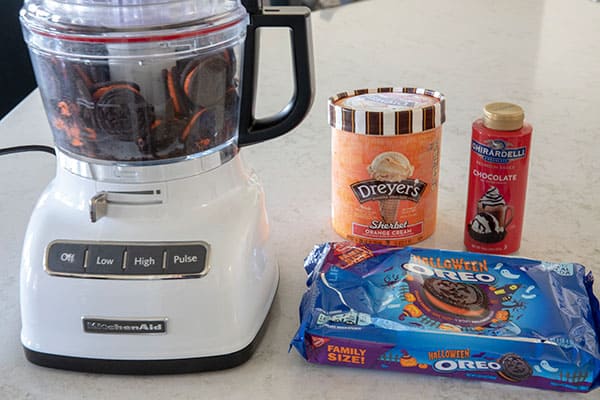
- 1 package (20 oz) Oreo cookies, divided
- 1/4 cup butter, melted
For the Filling and Topping
- 1 container (1.5 quarts) orange sherbet
- 2 cups heavy whipping cream
- 3 tablespoons powdered sugar
- 1/2 teaspoon vanilla extract
- Halloween sprinkles for decoration
How to Make Halloween Cinder Cake
Step 1: Create the Cookie Crust
Set aside about one-third of your Oreo cookies for decorating the top later. Place the remaining cookies in a large zip-top bag and crush them using a rolling pin, or pulse them in a food processor until you have fine crumbs with some slightly larger pieces for texture.
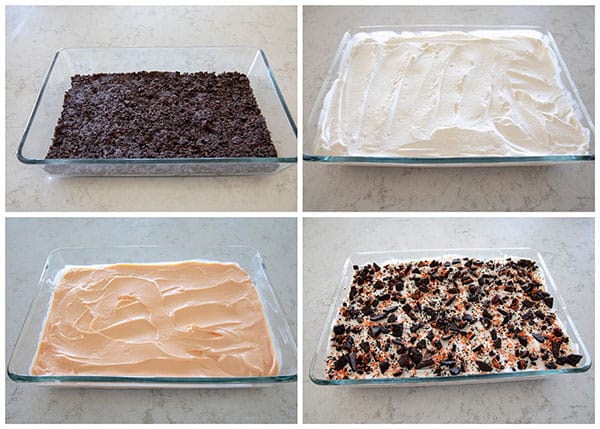
Transfer the crushed cookies to a bowl and pour in the melted butter. Mix thoroughly until all the crumbs are moistened. Press this mixture firmly and evenly into the bottom of an ungreased 9×13-inch pan to form your crust. Place the pan in the freezer for 30 minutes to allow the crust to firm up properly.
Step 2: Add the Sherbet Layer
Remove your orange sherbet from the freezer and let it sit on the counter until it becomes spreadable but not completely melted. You want it soft enough to spread smoothly but firm enough to hold its shape. If it gets too melted, it will mix with the cookie layer instead of forming a distinct layer.
When the sherbet reaches the right consistency, spread it evenly over the chilled cookie crust using an offset spatula or the back of a spoon. Return the pan to the freezer while you prepare the whipped cream topping.
Step 3: Whip the Cream
In a large mixing bowl, combine the heavy whipping cream, powdered sugar, and vanilla extract. Using an electric mixer, beat the mixture on medium-high speed until stiff peaks form. This usually takes 3 to 5 minutes. Don’t over-whip, or the cream may become grainy.
Spread the whipped cream evenly over the sherbet layer, creating decorative swirls if desired.
Step 4: Add the Finishing Touches
Roughly chop the reserved Oreo cookies and sprinkle them over the whipped cream layer. Add colorful Halloween sprinkles for extra festive flair. You can also arrange whole cookie pieces in a pattern if you prefer.
Cover the pan tightly with plastic wrap, being careful not to let it touch the decorated surface. Freeze for 2 to 3 hours, or until the sherbet layer is completely firm.
Step 5: Serve
When ready to serve, remove the pan from the freezer and let it sit at room temperature for 5 to 10 minutes to make cutting easier. Use a sharp knife dipped in hot water to cut clean squares. Wipe the knife between cuts for the neatest presentation.
Tips for Perfect Results
Choose Quality Ice Cream
Look for orange cream sherbet if available, as the swirls of vanilla create a creamsicle flavor that complements the chocolate beautifully. Regular orange sherbet works wonderfully too.
Don’t Skip the Freezing Steps
Each freezing step ensures proper texture and clean layers. Rushing the process can result in muddy layers that blend together instead of remaining distinct.
Make It Ahead
This dessert is ideal for advance preparation. You can make it up to a week ahead and keep it covered in the freezer until serving time. This makes party planning much easier.
Customize the Toppings
Beyond sprinkles, consider adding chocolate sauce drizzle, mini chocolate chips, crushed candy pieces, or even gummy worms for extra Halloween fun.
Proper Storage
Keep the cake tightly covered in the freezer. If you have leftovers, press plastic wrap directly onto the surface before covering the pan to prevent ice crystals from forming.
Recipe Variations
Classic Vanilla Version
Use vanilla ice cream instead of sherbet and regular Oreos instead of the Halloween variety for a timeless dessert suitable year-round.
Mint Chocolate
Swap the orange sherbet for mint chocolate chip ice cream and use chocolate cookies for a refreshing after-dinner treat.
Peanut Butter Twist
Layer peanut butter ice cream with chocolate cookies and add chopped peanut butter cups to the topping.
Birthday Celebration
Use rainbow sherbet or birthday cake ice cream with Golden Oreos and colorful sprinkles for a birthday party dessert.
Coffee Lovers
Try coffee ice cream with chocolate or vanilla cookies and a sprinkle of chocolate-covered espresso beans on top.
Serving Suggestions
This frozen dessert is rich and satisfying on its own, but you can elevate it further with these serving ideas:
- Drizzle with warm chocolate or caramel sauce just before serving
- Serve alongside hot fudge for dipping
- Add a dollop of additional whipped cream
- Garnish individual servings with fresh berries
- Serve with Halloween-themed cookies on the side
Frequently Asked Questions
Can I make this dessert without a mixer?
Yes, you can whip the cream by hand using a whisk, though it will take longer and require more arm strength. Make sure your bowl and cream are very cold for best results.
What if my sherbet melts too much?
If the sherbet becomes too soft, return it to the freezer for 15 to 20 minutes before spreading it on the crust. Working quickly also helps prevent excessive melting.
How long does this keep in the freezer?
Properly covered, this dessert stays fresh in the freezer for up to two weeks. The texture is best within the first week.
Can I use store-bought whipped topping instead?
While homemade whipped cream tastes better, you can substitute 8 ounces of thawed whipped topping if needed.
What’s the best way to cut frozen desserts?
Let the dessert sit at room temperature for 5 to 10 minutes, then use a sharp knife dipped in hot water. Wipe the knife clean between cuts for neat squares.
Can I double this recipe?
Absolutely. Use two 9×13-inch pans or one large sheet pan. Adjust freezing time as needed for larger portions.
What other cookie flavors work well?
Golden Oreos, chocolate chip cookies, graham crackers, or gingersnaps all make delicious crusts. Match your cookie choice to your ice cream flavor for best results.
Make-Ahead Instructions
This dessert is perfect for busy schedules and party planning:
- Prepare the entire dessert up to one week in advance
- Keep tightly covered in the freezer
- Add any delicate decorations just before serving
- Cut and plate individual servings while still frozen for easier handling at large gatherings
Nutritional Considerations
This is an indulgent dessert meant for special occasions. Each serving contains ice cream, cookies, butter, and heavy cream. For a lighter version, you can use light whipped topping, reduce the butter in the crust, or serve smaller portions.
Why Kids Love This Recipe
Children are drawn to this dessert for several reasons:
- The bright orange color is visually exciting
- Familiar flavors of cookies and ice cream feel comforting
- The crunchy-creamy texture combination is fun to eat
- Halloween sprinkles add to the festive feeling
- No complicated flavors—just straightforward sweetness
Perfect Occasions for Halloween Cinder Cake
While obviously suited for Halloween parties, this versatile dessert works for:
- Fall birthday parties
- Thanksgiving dessert table
- Classroom celebrations
- Harvest festivals
- Autumn potlucks
- Casual family gatherings
The Secret to Success
The key to a beautiful cinder cake lies in patience. Allow adequate freezing time between layers so each component maintains its identity. Don’t rush the softening of the sherbet—too firm and it won’t spread; too soft and it creates a mess.
Using quality ingredients makes a noticeable difference. Choose ice cream brands with fewer stabilizers for better flavor and texture. Real heavy cream whips up fluffier and tastes better than substitutes.
Creating Memories
Desserts like this Halloween Cinder Cake often become family traditions. The simple preparation makes it accessible for cooking with children, teaching them basic kitchen skills while creating something festive together. Years later, they’ll remember making this colorful, fun dessert during October.
The vintage charm of cinder cake recipes connects us to earlier generations who enjoyed these same simple pleasures. By adding seasonal twists, we keep these classic recipes alive while making them relevant for today’s celebrations.
Whether you’re hosting a Halloween bash, bringing a dish to a party, or simply want to surprise your family with a special treat, this no-bake frozen dessert delivers maximum impact with minimal effort. The combination of nostalgic flavors in a festive presentation makes it a winner every time.
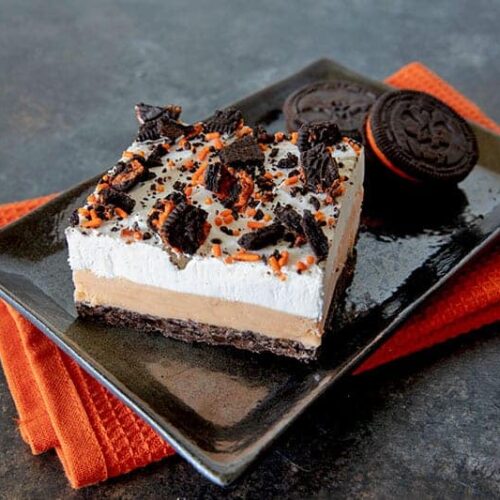
Halloween Cinder Cake
Ingredients
- 1 package 20 oz Oreo cookies, divided
- 1/4 cup butter melted
- 1 container 1.5 quarts orange sherbet
- 2 cups heavy whipping cream
- 3 tablespoons powdered sugar
- 1/2 teaspoon vanilla extract
- Halloween sprinkles
Instructions
- In a large zip-top bag, crush two-thirds of the Oreos using a rolling pin, or pulse them in a food processor until crushed.
- Combine the crushed cookies with melted butter and mix well. Press the mixture into an ungreased 9×13-inch pan to form an even crust. Freeze for 30 minutes.
- Allow the orange sherbet to soften at room temperature until spreadable but not melted. Spread evenly over the chilled cookie crust. Return to the freezer while preparing the whipped cream.
- In a large mixing bowl, combine heavy whipping cream, powdered sugar, and vanilla extract. Beat with an electric mixer until stiff peaks form. Spread the whipped cream over the sherbet layer.
- Chop the reserved Oreo cookies and sprinkle them over the whipped cream layer along with Halloween sprinkles.
- Cover the pan tightly with plastic wrap and freeze for 2 to 3 hours until firm.
- Before serving, let the dessert sit at room temperature for 5 to 10 minutes for easier cutting. Slice into squares and serve.
Notes

2 Comments