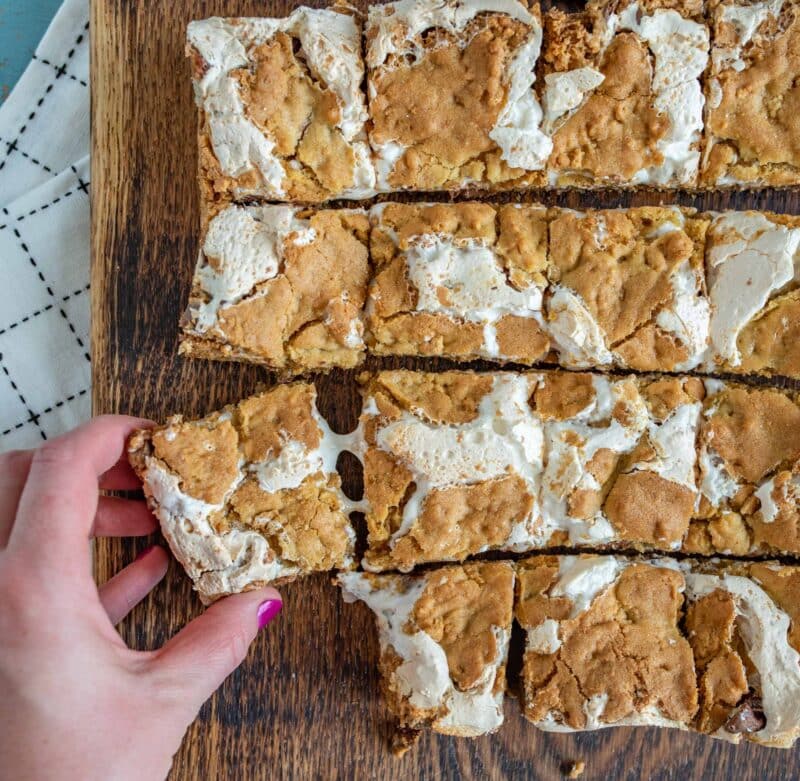
Reese’s S’mores Bars Recipe – Easy Peanut Butter Treat
Looking for a dessert that combines the nostalgic flavors of campfire s’mores with the irresistible taste of Reese’s peanut butter cups? These Reese’s S’mores Bars are exactly what you need. With layers of graham cracker cookie dough, melted peanut butter cups, chocolate chips, and fluffy marshmallow creme, every bite delivers the perfect balance of sweet, nutty, and chocolatey goodness.
What makes these bars truly special is how simple they are to prepare. In just 10 minutes of prep time and with a handful of pantry staples, you can create a show-stopping dessert that tastes like it took hours to make. Whether you’re planning a family gathering, need a potluck contribution, or simply want to treat yourself, these peanut butter s’mores bars deliver incredible flavor without the fuss.
Table of Contents
What Makes This Peanut Butter S’mores Recipe Stand Out
Traditional s’mores are wonderful, but this baked version takes the concept to a whole new level. By transforming the classic campfire treat into an easy-to-slice bar dessert and adding Reese’s cups into the mix, you get a treat that’s both familiar and excitingly different.
The graham cracker base provides a sturdy foundation with a hint of honey sweetness, while the peanut butter cups melt into pockets of creamy richness. The marshmallow creme spreads smoothly over everything, creating that signature s’mores gooeyness without the need for an open flame. Meanwhile, the chocolate chips fill every gap, ensuring no bite goes without chocolate.
These bars are also incredibly versatile. You can make them year-round in your kitchen oven, which means you don’t have to wait for camping season to enjoy s’mores. They’re perfect for birthday parties, bake sales, holiday gatherings, or just a weeknight dessert when you want something special.
Ingredients You’ll Need
The beauty of this recipe lies in its simplicity. Most ingredients are probably already in your kitchen.
- Butter – Use softened unsalted butter for the best texture and flavor control
- Brown Sugar – Adds moisture and a caramel-like depth to the cookie base
- Granulated Sugar – Balances the sweetness and helps create the right texture
- Egg – Binds everything together and adds richness
- Vanilla Extract – Enhances all the other flavors
- All-Purpose Flour – Forms the structure of your cookie dough base
- Baking Powder – Gives a slight lift to the bars
- Salt – Balances the sweetness and brings out the chocolate flavor
- Graham Crackers – Crushed into crumbs, these add authentic s’mores flavor
- Reese’s Peanut Butter Cups – The star ingredient; use regular or fun-sized
- Chocolate Chips – Semi-sweet or milk chocolate both work wonderfully
- Marshmallow Creme – Creates that gooey marshmallow layer without the mess
How to Make the Perfect Reese’s S’mores Bars
Prepare Your Pan
Start by preheating your oven to 350 degrees Fahrenheit. Take a 9-inch square baking pan and line it completely with aluminum foil, making sure to leave plenty of overhang on all sides. This overhang acts as handles that will make removing the bars much easier later. Spray the foil generously with cooking spray to prevent sticking.
Make the Cookie Dough Base
In a large mixing bowl, cream together the softened butter, brown sugar, and granulated sugar until the mixture becomes light and fluffy. This should take about three minutes with an electric mixer. The creaming process incorporates air into the butter, which helps create a tender texture.
Add the egg and vanilla extract, beating until everything is well combined and smooth. The mixture should look cohesive and slightly glossy.
In a separate step, add the flour, baking powder, and salt to the bowl. Stir gently until just combined, being careful not to overmix. Overmixing can lead to tough, dense bars. Finally, fold in the graham cracker crumbs until evenly distributed throughout the dough.
Assemble the Layers
Take about two-thirds of your cookie dough and press it firmly into the bottom of your prepared pan. Use your fingers or the bottom of a measuring cup to create an even layer that reaches all the corners. This base layer is crucial for structural integrity.
Unwrap your Reese’s peanut butter cups and arrange them evenly across the dough layer. Depending on the size you’re using, you’ll need 9 to 12 regular cups or the equivalent in fun-sized cups. Try to distribute them so each bar will have peanut butter cup in it.
Sprinkle the chocolate chips over the peanut butter cups, letting them fall naturally into the gaps and spaces. Don’t worry about perfection here; the chips will melt and spread during baking.
Now comes the slightly tricky part: spreading the marshmallow creme. Open the entire container and use a spatula to carefully spread it over the chocolate layer. Work gently to avoid disturbing the layers beneath. The marshmallow creme doesn’t need to cover every millimeter perfectly; it will spread as it bakes.
Take the remaining cookie dough and break it into small pieces. Scatter these pieces over the marshmallow layer, creating a rustic crumble topping. Again, complete coverage isn’t necessary; the dough will spread slightly during baking.
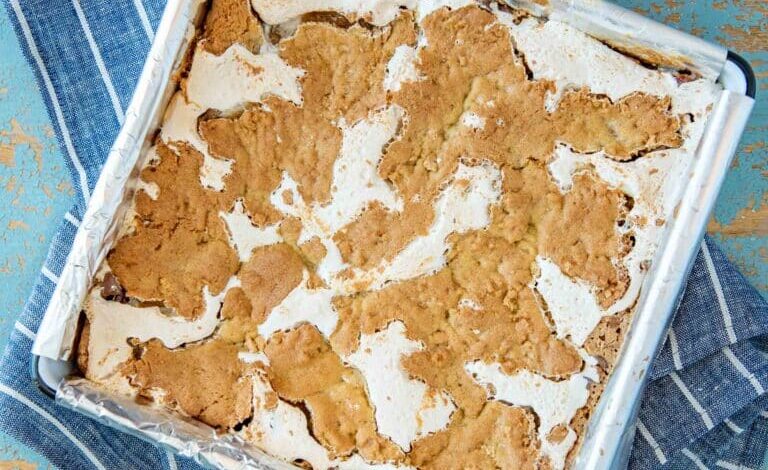
Bake and Cool
Place the pan in your preheated oven and bake for 25 minutes. You’re looking for the top to turn a lovely golden brown color. The edges may darken slightly, which is fine.
Once baked, remove the pan from the oven and let it cool completely in the pan for at least one hour. This cooling time is essential; it allows the layers to set properly. Rushing this step will result in bars that fall apart when cut.
After the initial cooling period, use the foil overhang to carefully lift the entire block of bars out of the pan. Place it on a wire cooling rack and let it continue cooling until completely set. This may take a couple more hours. If you’re in a hurry, you can refrigerate the bars to speed up the process.
Cut and Serve
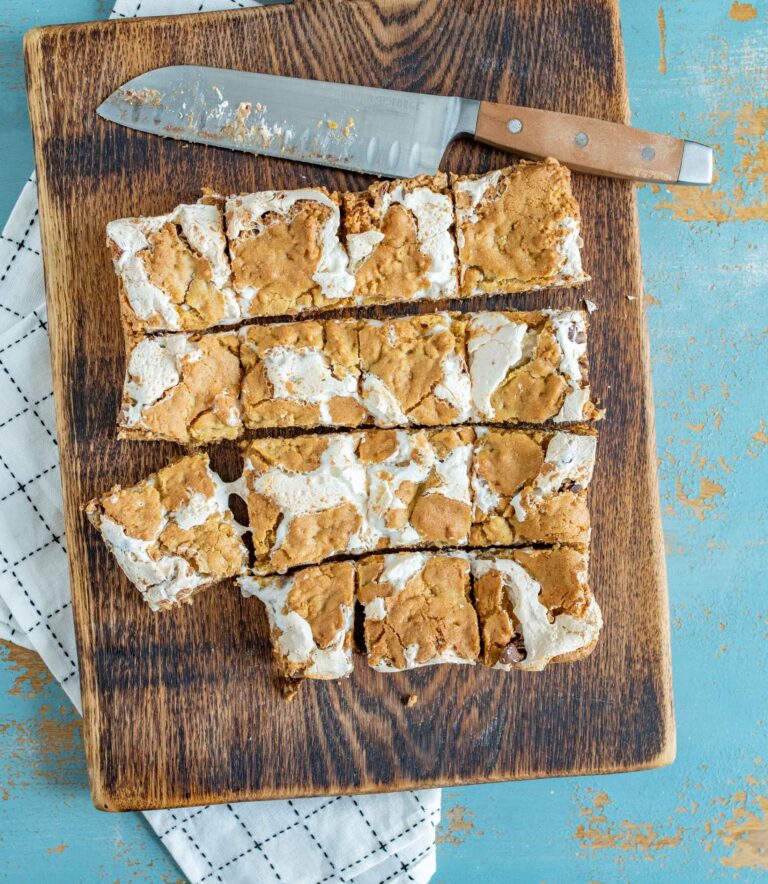
When fully cooled, use a sharp knife to cut the bars into squares. For the cleanest cuts, dip your knife in hot water and wipe it clean between each slice. The heat helps the knife glide through the sticky marshmallow and melted chocolate.
Cut the bars into 16 squares for generous portions, or into smaller pieces if you prefer. These bars are rich, so even smaller servings are satisfying.
Expert Tips for Success
Getting Clean Slices
The key to beautiful, bakery-worthy bars is patience during the cooling process. If the bars are still warm, the marshmallow and chocolate will be too soft to cut cleanly. For the absolute best results, chill the bars in the refrigerator for 30 minutes to an hour before cutting. The cold firms up all the layers, making slicing much easier.
Crushing Graham Crackers
You can crush graham crackers in several ways. Place them in a sealed plastic bag and use a rolling pin to crush them into fine crumbs. Alternatively, pulse them in a food processor until they reach the consistency of coarse sand. You need about six full graham cracker sheets to yield the right amount of crumbs.
Choosing Your Chocolate
Semi-sweet chocolate chips offer a nice balance that prevents the bars from being too sweet. However, if you prefer a sweeter flavor, milk chocolate chips work beautifully. For the best of both worlds, use a combination of semi-sweet and milk chocolate chips.
Working with Marshmallow Creme
Marshmallow creme can be sticky and challenging to spread. To make it easier, lightly spray your spatula with cooking spray before spreading. The oil prevents the marshmallow from sticking to your utensil. You can also wet the spatula with water, though this may slightly dilute the marshmallow.
Preventing Soggy Bottoms
Make sure your bottom cookie layer is pressed firmly and evenly into the pan. A compact base prevents the upper layers from seeping through and creating a soggy bottom. The more uniform your base, the better your bars will hold together.
Delicious Variations to Try
Different Candy Bars
While Reese’s cups are the star here, you can experiment with other candy bars. Try Snickers for a caramel-nougat twist, Milky Way for extra chocolate, or even peanut butter M&Ms for bursts of color and crunch.
Add Some Crunch
For added texture, sprinkle chopped pretzels or peanuts over the chocolate chips before adding the marshmallow layer. The salty crunch contrasts beautifully with the sweet, gooey layers.
Make Them Minty
Replace the Reese’s cups with York Peppermint Patties and use dark chocolate chips for a refreshing mint chocolate version that’s perfect for the holidays.
Go All Peanut Butter
Add peanut butter chips along with the chocolate chips, and use extra creamy peanut butter drizzled over the top after baking for an intense peanut butter experience.
Storage and Make-Ahead Tips
Store your Reese’s s’mores bars in an airtight container at room temperature for up to three days. Place parchment paper between layers if you’re stacking them to prevent sticking.
For longer storage, these bars freeze exceptionally well. Wrap individual bars in plastic wrap, then place them in a freezer-safe container or bag. They’ll keep for up to one month in the freezer. Thaw at room temperature for about an hour before serving, or warm them briefly in the microwave for that fresh-baked taste.
You can also make these bars a day or two in advance of an event. In fact, allowing them to sit overnight helps the flavors meld together even more, creating an even more delicious treat.
Serving Suggestions
These bars are delicious on their own, but you can take them to the next level with a few simple additions. Serve them warm with a scoop of vanilla ice cream for a decadent dessert. The contrast between the warm, gooey bars and cold, creamy ice cream is irresistible.
Drizzle melted chocolate or peanut butter over the top just before serving for an elegant presentation. A light dusting of powdered sugar also adds a beautiful finishing touch.
For a fun party idea, cut the bars into smaller bite-sized pieces and serve them as part of a dessert board alongside fresh fruit, cookies, and other sweet treats.
Frequently Asked Questions
Can I use regular marshmallows instead of marshmallow creme?
While marshmallow creme works best for even spreading and consistent texture, you can use regular marshmallows in a pinch. Cut them in half and arrange them cut-side down over the chocolate layer. They’ll melt and spread during baking, though the coverage may not be as uniform.
Why are my bars falling apart when I cut them?
This usually happens when the bars haven’t cooled completely. The marshmallow and chocolate need time to firm up. Make sure you allow the full cooling time, or even refrigerate the bars for an hour before cutting. Also, ensure you pressed the bottom layer firmly into the pan to create a stable base.
Can I make these in a different sized pan?
A 9-inch square pan is ideal for the right thickness and texture. If you use a larger pan, the bars will be thinner and may bake faster, so watch them carefully. A smaller pan will create thicker bars that need more baking time. Adjust accordingly and use visual cues like golden brown color to determine doneness.
Are these bars gluten-free?
As written, this recipe contains gluten from the flour and graham crackers. However, you can make gluten-free versions by using gluten-free all-purpose flour and gluten-free graham crackers. The texture may vary slightly, but the bars will still be delicious.
Can I double this recipe?
Yes, you can double the recipe and bake it in a 9×13-inch pan. Keep in mind that the larger pan may require a few extra minutes of baking time. Check for that golden brown color on top to know when they’re done.
Nutritional Information
Each bar contains approximately 232 calories, making them a reasonable treat when enjoyed in moderation. They provide a good balance of carbohydrates for energy, some protein from the peanut butter, and fats that help you feel satisfied.
While these bars are certainly an indulgence rather than health food, they’re made with real ingredients and contain less processed sugar than many store-bought desserts. The peanut butter adds protein and healthy fats, while the graham crackers provide some whole grain benefits.
Why This Recipe Works
The magic of these bars lies in how the different components work together. The cookie dough base provides structure and a subtle sweetness that doesn’t overpower the other flavors. The graham cracker crumbs add authentic s’mores taste and a pleasant texture.
The Reese’s cups are positioned in the middle where they soften but don’t completely melt away, creating pockets of creamy peanut butter throughout. The chocolate chips fill gaps and add extra chocolate in every bite, while the marshmallow creme binds everything together with its sticky sweetness.
The crumble topping bakes into a golden, slightly crispy layer that contrasts beautifully with the soft, gooey interior. Together, these layers create a complex texture and flavor profile that keeps you reaching for another piece.
Perfect Occasions for These Bars
These Reese’s s’mores bars are incredibly versatile and work for virtually any occasion. They’re perfect for summer cookouts when you want s’mores flavor without building a campfire. They’re ideal for school bake sales, as they’re easy to transport and appeal to all ages.
Bring them to potlucks and watch them disappear first from the dessert table. They’re excellent for birthday parties, especially for peanut butter lovers. During the holidays, they offer a fun alternative to traditional cookies and fudge.
They’re also wonderful for casual weeknight desserts when you want something special but don’t want to spend hours in the kitchen. The simple preparation and impressive results make them a go-to recipe for any sweet craving.
Reese’s S’mores Bars Recipe – Easy Peanut Butter Treat
Ingredients
- 1/2 cup butter softened
- 1/4 cup packed brown sugar
- 1/2 cup granulated sugar
- 1 large egg
- 1 teaspoon vanilla extract
- 1 1/4 cups all-purpose flour
- 1 teaspoon baking powder
- 1/4 teaspoon salt
- 6 graham cracker sheets crushed into fine crumbs
- 9-12 regular Reese’s peanut butter cups or equivalent in fun-sized
- 2/3 cup chocolate chips semi-sweet or milk chocolate
- 1 7-ounce container marshmallow creme
Instructions
- Preheat your oven to 350 degrees Fahrenheit. Line a 9-inch square baking pan with aluminum foil, allowing the foil to hang over all edges by about 2 inches. Spray the foil generously with cooking spray.
- In a large mixing bowl, cream together the softened butter, brown sugar, and granulated sugar using an electric mixer on medium speed. Beat for about 3 minutes until the mixture is light in color and fluffy in texture.
- Add the egg and vanilla extract to the butter mixture. Beat on medium speed until fully incorporated and smooth.
- Add the flour, baking powder, and salt to the bowl. Stir with a wooden spoon or spatula until just combined, being careful not to overmix. Fold in the graham cracker crumbs until evenly distributed throughout the dough.
- Take approximately two-thirds of the dough and press it firmly and evenly into the bottom of your prepared pan. Use your fingers or the bottom of a measuring cup to compact the dough, making sure it reaches all corners and edges.
- Unwrap the Reese’s peanut butter cups and arrange them evenly over the dough base. Space them so each bar will contain peanut butter cup when cut.
- Sprinkle the chocolate chips evenly over the peanut butter cups, allowing them to fall naturally into the spaces between the cups.
- Open the marshmallow creme container. Using a spatula lightly sprayed with cooking spray, carefully spread the entire container of marshmallow creme over the chocolate chip layer. Work gently to avoid disturbing the layers below.
- Break the remaining dough into small pieces and scatter them over the marshmallow layer, creating a crumble topping. The pieces don’t need to cover every spot completely.
- Bake in the preheated oven for 25 minutes, or until the top turns golden brown. The edges may be slightly darker.
- Remove from the oven and allow the bars to cool in the pan for at least 1 hour at room temperature.
- After the initial cooling, use the foil overhang to lift the entire block of bars out of the pan. Place on a wire cooling rack and let cool completely for another 1-2 hours, or refrigerate for faster setting.
- Once completely set, use a sharp knife dipped in hot water to cut into 16 squares. Wipe the knife clean between cuts for the neatest slices.
Notes
- For the cleanest cuts, refrigerate the bars for 30-60 minutes before slicing
- Fun-sized Reese’s cups work just as well as regular sized; use about 20-24 fun-sized cups
- Press the bottom dough layer very firmly to prevent the bars from falling apart when cut
- The foil overhang is essential for easy removal from the pan
- These bars are very rich, so smaller portions are quite satisfying
- If the marshmallow creme is hard to spread, microwave the container (without the lid) for 5-10 seconds to soften it slightly
Nutrition Information
Carbohydrates: 40g | Protein: 4g | Fat: 6g | Saturated Fat: 3g | Cholesterol: 1mg | Sodium: 406mg | Potassium: 97mg | Fiber: 2g | Sugar: 18g