Homemade Chocolate Chip Cookie Ice Cream Sandwiches
The Ultimate Easy Frozen Dessert with Cookies, Ice Cream, and Sprinkles
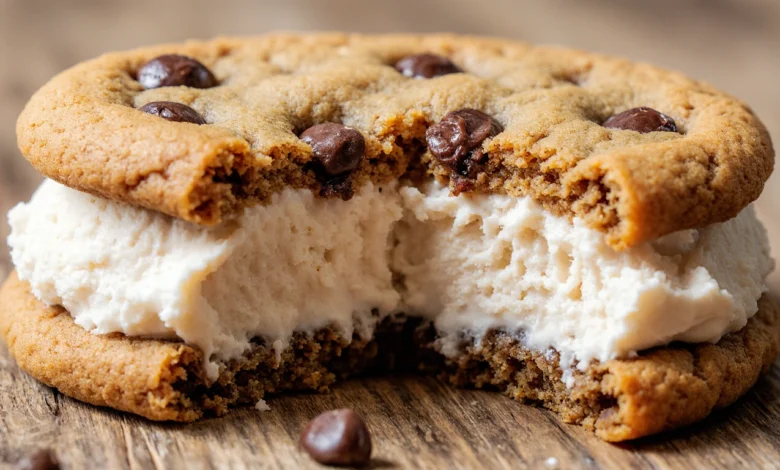
Transform simple chocolate chip cookies and your favorite ice cream into restaurant-quality frozen treats right in your own kitchen. These chocolate chip cookie ice cream sandwiches require just three basic ingredients and deliver impressive results that rival any ice cream parlor creation. Whether you’re hosting a summer barbecue, planning a birthday party, or simply satisfying a midnight craving, this foolproof recipe creates picture-perfect desserts that taste even better than they look.
The beauty of this recipe lies in its flexibility and simplicity. Use freshly baked cookies for that homemade touch, or grab a package from the store when time is tight. Either approach produces delicious results. The key is understanding a few simple techniques that ensure your ice cream sandwiches hold together beautifully and maintain the perfect texture after freezing.
Why You’ll Love This Ice Cream Sandwich Recipe
This recipe solves every challenge that comes with making frozen desserts at home:
- Beginner-friendly assembly: No special equipment, baking skills, or culinary expertise required. If you can scoop ice cream and press two cookies together, you can master this recipe.
- Completely customizable: Switch up cookie types, experiment with different ice cream flavors, and rotate toppings based on seasons or celebrations. The base technique remains the same regardless of variations.
- Perfect make-ahead dessert: Prepare these treats days or weeks before your event. They store beautifully in the freezer, actually improving in texture as the flavors meld together over time.
- Budget-friendly indulgence: Create gourmet-style frozen desserts for a fraction of what specialty ice cream shops charge. One batch makes enough to feed a crowd without breaking the bank.
- Kid-approved activity: Children love helping assemble these sandwiches, especially rolling the edges through colorful sprinkles. It’s an engaging kitchen project that keeps little ones entertained while teaching basic cooking skills.
Essential Ingredients
This recipe keeps things delightfully simple with just three core components:
Main Ingredients
- 8 chocolate chip cookies (3-4 inches diameter)
- 2 cups vanilla ice cream
- ½ cup rainbow sprinkles (optional but recommended)
Choosing the Best Cookies
Cookie selection makes or breaks your ice cream sandwiches. Look for cookies with these characteristics:
Ideal texture: Soft, chewy cookies work infinitely better than crisp, crunchy varieties. When frozen, crisp cookies become rock-hard and difficult to bite through without the sandwich falling apart. Slightly underbaked chocolate chip cookies maintain a tender, pleasant texture even at freezing temperatures.
Proper size: Aim for cookies measuring 3-4 inches across. This diameter provides enough surface area for a generous ice cream portion while remaining easy to handle and eat. Oversized cookies become unwieldy, while tiny cookies don’t hold enough ice cream to satisfy.
Flat surface: Cookies with relatively flat tops and bottoms create stable sandwiches. Heavily domed cookies leave gaps where ice cream can’t fill properly, resulting in uneven distribution and messy eating experiences.
Ice Cream Selection Tips
Quality matters: Premium ice cream brands with higher butterfat content create creamier sandwiches that maintain better texture after refreezing. Budget brands often contain more air and ice crystals, leading to grainier results.
Softening technique: Remove ice cream from the freezer and let it stand at room temperature for 5-10 minutes before assembly. You want it spreadable but not melting. The ideal consistency resembles soft-serve—pliable enough to scoop easily but still holding its shape.
Flavor considerations: While vanilla serves as the perfect neutral base that complements chocolate chip cookies, don’t hesitate to experiment. Coffee ice cream adds sophistication, strawberry brings fruity brightness, and mint chocolate chip creates refreshing contrast.
Sprinkles and Coating Options
The coating step adds visual appeal and textural interest. Beyond traditional rainbow sprinkles, consider these alternatives:
- Mini chocolate chips for extra chocolate intensity
- Crushed pretzels for sweet-salty contrast
- Chopped toasted nuts (pecans, almonds, or peanuts)
- Shredded coconut (toasted or plain)
- Crushed cookies or graham crackers
- Crushed candy pieces (peppermints, toffee, or candy bars)
- Themed sprinkles matching your occasion or holiday
Step-by-Step Assembly Instructions
Preparation Phase
Step 1: Remove your ice cream from the freezer and place it on the counter to soften slightly. This typically takes 5-10 minutes depending on your kitchen temperature. Meanwhile, gather all your materials—cookies, sprinkles or coating, plastic wrap, and a shallow dish for rolling.
Step 2: Pour approximately ½ cup of sprinkles (or your chosen coating) into a shallow plate or pie dish. The wide, flat surface makes rolling easier than using a bowl. Cut 4 sheets of plastic wrap, each measuring roughly 12 inches square. Having everything ready prevents rushing when working with softening ice cream.
Building Your Sandwiches
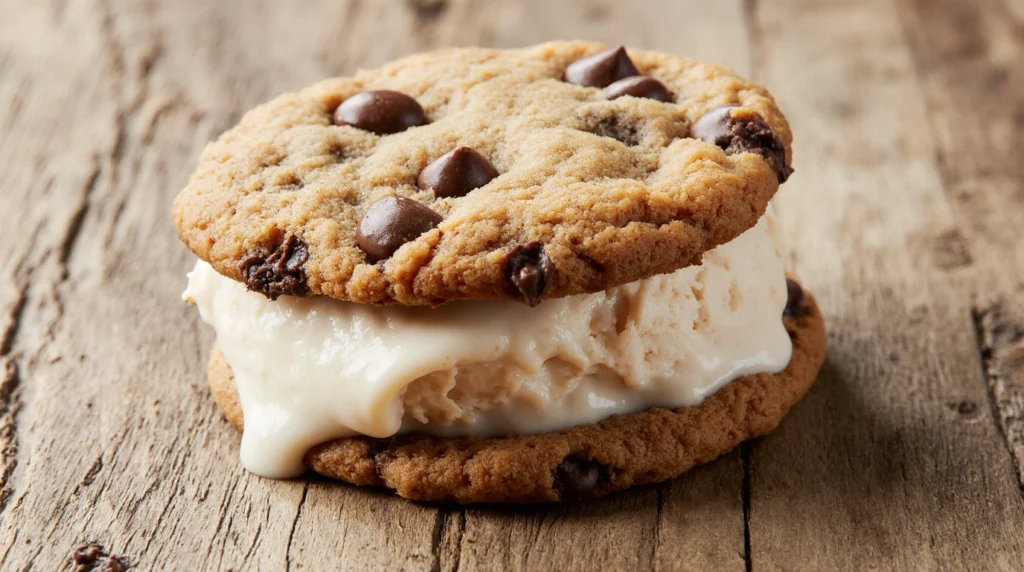
Step 3: Place one cookie flat-side up on your work surface. Using an ice cream scoop or large spoon, measure approximately ½ cup of softened ice cream and place it in the center of the cookie. Don’t spread it to the edges yet—the next step handles that.
Step 4: Top with a second cookie, flat-side down, and press gently but firmly. The ice cream will spread outward toward the edges as you apply pressure. Continue pressing until ice cream reaches the cookie perimeter all the way around, creating an even layer with no gaps.
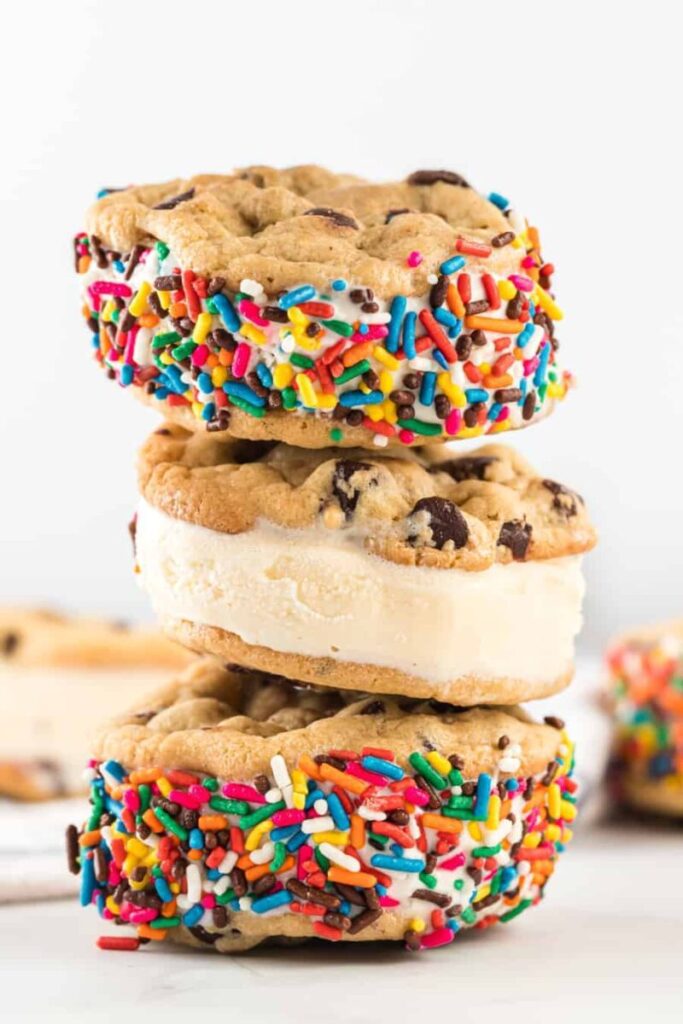
Step 5: Hold the sandwich horizontally and roll the exposed ice cream edge through your sprinkles or coating. Rotate the sandwich as you roll, ensuring complete coverage around the entire circumference. The sprinkles should stick readily to the slightly softened ice cream.
Step 6: Place the completed sandwich on a sheet of plastic wrap. Wrap it completely, ensuring no ice cream remains exposed to air (which causes freezer burn). Immediately transfer to the freezer while you assemble the remaining sandwiches.
Step 7: Repeat steps 3-6 with remaining cookies and ice cream. Work efficiently but don’t rush—it’s better to assemble carefully than to hurry and create messy results.
Freezing and Storage
Step 8: Freeze assembled sandwiches for a minimum of 4 hours, though overnight works best. This firming period is crucial—serving too early results in drippy, collapsing sandwiches. Once completely frozen, sandwiches can remain wrapped individually or transferred to a freezer-safe container or zip-top bag for longer storage.
Expert Tips for Perfect Results
Temperature Management
Working with ice cream requires attention to temperature. If your kitchen is particularly warm, consider these strategies:
- Assemble sandwiches in batches of two, returning the ice cream container to the freezer between batches
- Chill your work surface by placing a baking sheet in the freezer for 10 minutes before starting
- Keep assembled sandwiches in the freezer as you work on subsequent ones
- If ice cream becomes too soft during assembly, place the container back in the freezer for 5-10 minutes before continuing
Achieving Uniform Size
Professional-looking sandwiches feature consistent thickness and appearance. Use a standard ice cream scoop (typically ½ cup capacity) to measure identical portions for each sandwich. This ensures even freezing times and uniform presentation.
Preventing Cracks and Breaks
Nobody wants cookies that shatter at first bite. Prevent this common problem by:
- Choosing naturally soft, chewy cookies rather than crispy varieties
- Avoiding overbaked cookies, which become harder when frozen
- Letting sandwiches sit at room temperature for 2-3 minutes before eating (just enough to take the extreme chill off without melting)
- Using high-quality ice cream with higher fat content, which remains softer when frozen
Storage Best Practices
Proper storage extends shelf life and maintains quality:
- Wrap each sandwich individually in plastic wrap, pressing out air bubbles
- For storage beyond one week, place wrapped sandwiches in a freezer-safe zip-top bag
- Label bags with the date and flavor combinations
- Store in the main freezer compartment, not the door (where temperature fluctuates)
- Consume within one month for optimal flavor and texture
Creative Flavor Combinations
Once you master the basic technique, explore these exciting variations:
Classic Pairings
- Double Chocolate Delight: Chocolate cookies + chocolate ice cream + mini chocolate chips on edges
- Cookies and Cream: Chocolate chip cookies + cookies and cream ice cream + crushed Oreos on edges
- Peanut Butter Paradise: Peanut butter cookies + vanilla ice cream + chopped peanuts or peanut butter chips on edges
Gourmet Upgrades
- Salted Caramel Crunch: Chocolate chip cookies + salted caramel ice cream + toffee bits on edges
- Mint Chocolate Perfection: Double chocolate cookies + mint chip ice cream + crushed Andes mints on edges
- Coffee House Special: Chocolate chip cookies + coffee ice cream + mini chocolate chips on edges
Seasonal Specialties
- Summer Berry Blast: Sugar cookies + strawberry ice cream + freeze-dried strawberry pieces on edges
- Fall Harvest: Snickerdoodle cookies + pumpkin ice cream + cinnamon sugar on edges
- Winter Wonderland: Chocolate cookies + peppermint ice cream + crushed candy canes on edges
- Spring Celebration: Lemon cookies + raspberry sorbet + white chocolate shavings on edges
Troubleshooting Common Issues
Ice Cream Melts Too Quickly
If ice cream becomes soupy during assembly, your kitchen is likely too warm or the ice cream was over-softened. Return it to the freezer for 10-15 minutes before attempting another sandwich. Consider working in smaller batches or running your air conditioning during assembly.
Cookies Crack When Eating
Overly crisp cookies or extremely cold sandwiches cause this problem. Let sandwiches sit at room temperature for 2-3 minutes before serving, just enough to slightly soften without melting. Next time, choose softer cookies or slightly underbake homemade ones.
Sprinkles Won’t Stick
This occurs when ice cream is too firm during the coating step. The ice cream edge should be slightly soft and tacky. If sprinkles won’t adhere, let the sandwich sit for 30 seconds to a minute, then try rolling again.
Uneven Ice Cream Distribution
Placing ice cream off-center or using the wrong amount causes one side to have more filling than the other. Always center your ice cream scoop and use consistent measurements. Press evenly from the center outward when adding the top cookie.
Freezer Burn After Storage
Inadequate wrapping allows air to contact the ice cream, causing icy crystals and off-flavors. Ensure plastic wrap makes complete contact with the sandwich surface, pressing out all air. For extended storage, add a second layer of protection with a freezer bag.
Serving Suggestions and Occasions
These versatile desserts fit countless occasions:
Parties and Celebrations
- Birthday parties (customize colors to match the theme)
- Summer barbecues and cookouts
- Pool parties and beach gatherings
- Graduation celebrations
- Baby showers (use pink or blue sprinkles)
- Wedding showers and rehearsal dinners
Everyday Enjoyment
- After-school snacks for children
- Quick dessert when unexpected guests arrive
- Late-night treat that requires no preparation
- Lunchbox surprises (wrapped well to stay frozen)
- Weekend family movie nights
Holiday Themes
Adapt decorations to match any holiday:
- Valentine’s Day: Pink and red sprinkles, heart-shaped cookies
- St. Patrick’s Day: Green sprinkles, mint ice cream
- Easter: Pastel sprinkles, spring-colored coatings
- 4th of July: Red, white, and blue sprinkles
- Halloween: Orange and black sprinkles, ghost-shaped cookies
- Christmas: Red and green sprinkles, peppermint coating
Frequently Asked Questions
Can I make these with homemade cookies?
Absolutely! Homemade cookies often produce superior results since you can control the texture. Bake them slightly underdone for that perfect soft, chewy consistency. Let cookies cool completely to room temperature before assembling sandwiches, or they’ll melt the ice cream on contact.
How far in advance can I prepare ice cream sandwiches?
These freeze beautifully for up to one month when properly wrapped. For the best texture and flavor, consume within two weeks. Always label your storage container with the preparation date so you can track freshness.
What’s the best way to soften cookies before serving?
Remove sandwiches from the freezer and let them stand at room temperature for 2-3 minutes before eating. This brief tempering period takes the extreme chill off without melting the ice cream. In very warm weather, reduce this to 1-2 minutes.
Can I use store-bought cookie dough?
Yes! Refrigerated cookie dough from the grocery store works perfectly. Follow package directions for baking, but remove cookies from the oven when they still look slightly underdone in the center. They’ll continue baking on the hot pan and develop that ideal chewy texture for ice cream sandwiches.
Why do my sandwiches get icy after freezing?
Ice crystals form when moisture escapes and refreezes. This happens due to inadequate wrapping or temperature fluctuations in your freezer. Wrap sandwiches tightly in plastic wrap, removing as much air as possible. Store them in the back of the freezer where temperature remains most stable.
Can I use ice cream alternatives like frozen yogurt or sorbet?
Certainly! Frozen yogurt creates a tangier, slightly lighter sandwich. Sorbet offers a dairy-free option, though it tends to be harder when frozen—let it soften a bit more before assembly. Non-dairy ice creams made from coconut, almond, or oat milk also work well.
What if I don’t have sprinkles?
Skip the coating entirely for simple, classic sandwiches, or raid your pantry for alternatives. Crushed graham crackers, cookie crumbs, shredded coconut, mini marshmallows, or even crushed breakfast cereal all make interesting coatings. Get creative with whatever you have on hand.
How do I prevent the ice cream from melting while I work?
Work in a cool kitchen, assemble quickly and efficiently, and keep the ice cream container in the freezer between scooping. Some bakers even place a bowl of ice under their work surface to maintain a cool environment. If assembly will take more than 10 minutes, consider working in two batches.
Nutritional Information
Per sandwich (based on 4 servings):
- Calories: 247
- Total Carbohydrates: 30g
- Protein: 3g
- Total Fat: 13g (7g saturated)
- Cholesterol: 31mg
- Sodium: 132mg
- Sugar: 21g
- Fiber: 1g
Note: Nutritional values vary based on cookie size, ice cream brand, and coating choices. These figures represent estimates using standard ingredients.
Making This Recipe Your Own
The basic ice cream sandwich formula is just a starting point. Once you understand the fundamental techniques, customization becomes limitless:
Cookie Experimentation
Try oatmeal raisin cookies with cinnamon ice cream, peanut butter cookies with chocolate ice cream, or sugar cookies with any flavor you love. Even brownies cut into squares make excellent ice cream sandwich “cookies” for an extra-decadent treat.
Mix-In Magic
Before adding the top cookie, sprinkle mix-ins directly onto the ice cream layer. Chocolate chips, crushed candy, or nuts add surprise bursts of flavor and texture throughout each bite.
Drizzle Decoration
After freezing completely, drizzle sandwiches with melted chocolate, caramel sauce, or fruit syrup. Return to the freezer briefly to set the drizzle before serving. This adds professional bakery flair with minimal effort.
Size Variations
Make mini sandwiches using 2-inch cookies for bite-sized treats perfect for parties, or go giant with 5-6 inch cookies for an over-the-top dessert experience. Adjust ice cream quantities proportionally.
Final Tips for Success
- Always have your workspace and materials completely ready before removing ice cream from the freezer
- Quality ingredients produce noticeably better results—don’t skimp on cookie or ice cream quality
- Patience during the freezing phase pays off with sandwiches that hold together beautifully
- Label your creations with flavor combinations to avoid mystery sandwiches in the freezer
- Double or triple the recipe easily for large gatherings or to stock your freezer
Why This Recipe Works
This chocolate chip cookie ice cream sandwich recipe succeeds because it respects the science behind frozen desserts while remaining accessible to home cooks of any skill level. The slightly softened ice cream bonds to the cookies during assembly, then firms up in the freezer to create a cohesive treat. The coating step serves both aesthetic and practical purposes—adding visual interest while creating a barrier that helps contain the ice cream as you eat.
Perhaps most importantly, this recipe accommodates real life. Forgot to thaw ice cream adequately? Work a bit faster and expect slightly more rustic-looking results. Don’t have sprinkles? Go without. Using store-bought cookies instead of homemade? Nobody will complain. The basic technique remains forgiving and flexible, welcoming adaptations without sacrificing delicious results.
Whether you’re a parent seeking an engaging kitchen project with children, a host planning dessert for a crowd, or simply someone who appreciates the simple pleasure of cookies and ice cream combined, this recipe delivers satisfaction every single time. The investment of a few minutes yields frozen treats you’ll reach for again and again, proving that homemade doesn’t have to mean complicated.
Gather your cookies, choose your favorite ice cream flavor, and create a batch of these irresistible frozen sandwiches today. Your freezer—and everyone who opens it—will thank you.
Chocolate Chip Cookie Ice Cream Sandwich Recipe
Ingredients
- 8 chocolate chip cookies homemade or store-bought
- 2 cups vanilla ice cream
- Sprinkles optional
Instructions
- Start by setting out your ice cream so that it can soften up. While your ice cream is softening, get out a plate or a shallow dish, and pour about a half cup of sprinkles into it.
- Next, cut 4 pieces of plastic wrap that are about a foot long and set them aside.
- Take one of the cookies and put a half cup of the soften ice cream on it, keeping it to the center. Place another cookie on top and press it together, so that the ice cream starts to come right to the edge of the cookies.
- Roll the ice cream edge in the sprinkles. Wrap in plastic wrap.
- Repeat with the other cookies and ice cream.
- Place ice cream sandwiches in the freezer overnight or until the ice cream firms back up.
- Unwrap and enjoy!
- Notes
Notes
- Mini chocolate chips, crushed nuts, shredded coconut, crushed candy pieces, and cookie crumbs for the edges instead of sprinkles
- Blue or pink sprinkles for a baby shower (for the expected gender of the baby or both if I don’t know!)
- Chopped chocolate mint candies for St. Patrick’s Day (it has the green coloring in the candies)
- Red, white, and blue sprinkles or crushed candies for patriotic holidays like Memorial Day and 4th of July
- Dark chocolate cookies with mint ice cream
- Snickerdoodles with cinnamon ice cream
- Chocolate chip cookies with coffee ice cream.

2 Comments